
Last updated November 18, 2026








Free written scope consultation - allowances, timeline, and change-order rules on paper before a single trade is scheduled
Bathroom Remodeling Maintenance Schedule: What to Do and When
Silicone caulk at the tub-to-tile joint has a functional life of 3 to 5 years under normal use. Most homeowners don’t re-caulk until they can see black mold, which means water has already been moving behind the tile for months by the time anyone notices. A remodeled bathroom isn’t a finish-and-forget room. It’s a set of materials on different clocks, and those clocks start ticking the day the grout cures. What follows is the actual schedule by material type: what to inspect and when, what to reseal and how often, and which warning signs mean call a contractor instead of a sponge. We’ll use Santa Clarita conditions to keep it real, because hard water here changes the math.
Quick Answer
A remodeled bathroom needs a month-by-month inspection for the first year, then a seasonal routine after that: caulk replaced every 3 to 5 years, cement-based grout sealed every 12 to 24 months, exhaust fan cleaned every 6 months to a year, and fixtures descaled monthly in hard-water areas like Santa Clarita. Tasks that involve water behind tile, substrate dampness, or a drain that keeps backing up are contractor calls, not DIY jobs.
Styles & brands we work with
- Kitchen remodeling
- Bathroom remodeling
- Home additions & ADU
- Roofing
- Windows & doors
- Driveway & pavers
- Fence
Table of Contents
- The First Year After a Bathroom Remodel: A Month-by-Month Calendar
- Grout Sealing Frequency by Grout Type
- Caulk: The 3-to-5-Year Rule and What Triggers Replacement
- Exhaust Fan Cleaning: The Moisture Control Nobody Does
- Santa Clarita Hard Water and What It Does to Your Bathroom
- Which Maintenance Tasks Are DIY and Which Aren’t
- Documenting Your Maintenance Routine for Warranty and Resale
The First Year After a Bathroom Remodel: A Month-by-Month Calendar
The first 12 months are the diagnostic window. Anything that was installed wrong tends to show itself inside a year, which is precisely why a written guarantee matters more in month 8 than month 1. Here’s how we walk homeowners through it.
- Weeks 1 to 4: Let the room settle. Don’t scrub new grout aggressively; haze wipes off with a damp cloth. Check that the caulk lines at the tub, shower pan, and backsplash are continuous with no gaps. Run the exhaust fan and time how long the mirror takes to clear. Note any grout pinholes or low spots.
- Month 2: Seal cement-based grout for the first time if it wasn’t sealed at install. Test the shutoff valves under the sink and behind the toilet by turning them a quarter turn and back. Look at the base of the toilet for any rockiness or seepage.
- Month 3: Clean the exhaust fan for the first time. Check the shower door sweep for contact with the curb. Reseal any grout line that drank sealer faster than the rest.
- Month 6: Second fan cleaning. Re-inspect every caulk joint with a flashlight at a low angle, which catches moisture shadows better than overhead light. Inspect the ceiling below the bathroom if you have one, for any discoloration.
- Month 9: Descale the showerhead by soaking it in vinegar solution or removing it if it’s on a removable arm. Check the toilet flapper by adding a few drops of food coloring to the tank; if color appears in the bowl without flushing, the flapper is leaking.
- Month 12: Full annual inspection. Photograph everything. Re-seal grout if water beads no longer form. This is your warranty documentation baseline.
If anything in months 2 through 9 points to a leak, moisture, or substrate issue, that’s under the 365-Day Done Right Promise on our projects and we come back at no charge. A bathroom remodel in Santa Clarita runs $12,000 to $38,000 depending on size, tile, and fixture line, and nobody should be paying for a callback on year one.
Grout Sealing Frequency by Grout Type
Grout type determines the schedule. This is where “check it annually” advice falls apart, because a cement-based grout and an epoxy grout have entirely different maintenance needs.
- Cement-based sanded or unsanded grout: Seal every 12 to 24 months. Sanded for floors and wider joints, unsanded for wall tile and thin joints. Sealers penetrate the surface; if water still beads on a test splash, you have time. If it soaks in dark and stays dark for more than a minute, seal now.
- Epoxy grout: Almost never needs sealing. Epoxy is essentially plastic and impervious. Clean it with a pH-neutral cleaner and skip the sealer entirely. Scrubbing it with an abrasive pad is what ruins it, not water.
- Urethane grout: Sealer is built in at manufacture. Re-seal only if you see wear on high-traffic floor joints, maybe every 3 to 5 years.
- Grout with a factory additive: Read the product spec. Some installations skipped a topcoat sealer because the grout is pre-sealed. Re-sealing a pre-sealed grout is wasted money, not damage.
Grout failure also shows up as cracks, crumbling joints, or dark lines that don’t lighten after a cleaning. Those aren’t re-seal candidates. That’s when you need to see a Bathroom Remodeling in Santa Clarita contractor, because crumbling grout in a wet area usually means substrate movement or water intrusion, and no amount of sealer fixes either one.
Caulk: The 3-to-5-Year Rule and What Triggers Replacement
Silicone caulk at the tub-to-tile joint is good for 3 to 5 years. That’s the honest number, and no product marketing changes it. Heat cycling, tub flex, and cleaning chemicals all eat into that window. What shortens the lifespan further:
- Gaps or peeling at either edge: Replace. Peeling means water got behind the bead.
- Black or pink spotting that returns after cleaning: Replace. That’s mold in the joint, not surface mildew.
- A tub or shower pan that flexes when you step in: Replace the caulk and have the flex looked at. Flexible pans tear caulk loose from the wall. Fixing the caulk without addressing the flex is a six-week repair.
- Bathroom with no exhaust fan or a fan that doesn’t move air: Replace annually until the fan is dealt with.
Replacement means removal, not a new bead of silicone over the old one. Scrape out the old caulk fully, clean with alcohol, let the joint dry, then re-caulk at the correct depth with a proper backer. On a well-used Santa Clarita bathroom with a shower used twice a day, we’ve seen caulk joints fail at 3 years, not 5. Plan for the shorter end.
Exhaust Fan Cleaning: The Moisture Control Nobody Does
Exhaust fans are the single most neglected component in a bathroom, and they’re load-bearing for the whole maintenance calendar. A fan clogged with dust moves half the air it was rated for, which means moisture hangs in the room, which speeds grout failure, caulk failure, and mold growth everywhere else.
Clean the fan every 6 months, or every 3 months if you have pets or a bathroom used daily by more than two people. The routine takes about 15 minutes:
- Kill power at the breaker, not the wall switch, and confirm the fan is dead before you touch it.
- Remove the grille and soak it in warm soapy water. Dry it completely before reinstall.
- Vacuum the visible blades and housing with a brush attachment. Don’t bend anything.
- If the fan has a removable motor, unplug it and clean the blades with a damp rag. If it doesn’t, leave the motor alone and vacuum around it.
- Restore power and test the fan with a tissue against the grille. If the tissue falls, airflow is below spec and the fan needs replacing, not just cleaning.
Santa Clarita’s dry climate hides the problem in winter and makes it obvious in summer, when the fan spends its whole run working against outdoor humidity and interior moisture at once. An intermittent or failing fan is a bathroom maintenance signal worth acting on.
Santa Clarita Hard Water and What It Does to Your Bathroom
Santa Clarita’s municipal water runs hard, high in calcium and magnesium, and that changes the bathroom maintenance schedule in real ways. What we see in our remodels here:
- Calcium scale on fixtures: Chip it off gently with a plastic scraper and dissolve the rest with a 50/50 vinegar soak, or use a dedicated descaler. Never use abrasive pads on Kohler or Moen finishes; they dull the finish and reveal the base metal.
- Grout staining: Hard water leaves white chalky deposits in grout joints that ordinary mopping won’t touch. A phosphoric-acid grout cleaner once a quarter handles it, used with ventilation and gloves.
- Showerhead and aerator clogging: Descale monthly with a vinegar soak. Moen and Delta showerheads are generally removable for this exact reason. A showerhead dribbling sideways after a year isn’t broken; it’s scaled.
- Toilet ring buildup: A Toto or Kohler toilet with hard water in a low-use guest bath will show a mineral ring at the water line within 6 to 9 months. A pumice stone (wet) once or twice a year, used gently, removes it without scratching.
A whole-house water softener is the real fix. Homeowner reports in Santa Clarita put the payback in the 4 to 7 year range against fixture replacement and cleaning products, depending on water hardness at your address and how many fixtures you’re trying to protect. If a softener isn’t in the budget, a carbon or softening shower filter runs $30 to $100 and extends the interval between descales by roughly half. We install Kohler and Moen fixtures that hold their finish well, but hard water dulls even the best plumbing over time; the schedule is what protects them.
Which Maintenance Tasks Are DIY and Which Aren’t
Here’s the practical line between the two, based on what’s behind the surface rather than what you can see.
DIY-appropriate:
- Caulk replacement at a tub or shower joint, with proper removal.
- Grout cleaning and sealer application on sound, non-cracked grout.
- Exhaust fan grille and visible-blade cleaning.
- Descaling fixtures, showerheads, and faucet aerators.
- Toilet flapper replacement and refill valve adjustments.
- Verifying shutoff valves work and knowing where they are.
Call a contractor:
- Grout that’s crumbling, has holes, or is cracked all the way through. That points to substrate issues under the tile, and sealer can’t fix what’s happening below.
- Soft spots or movement in the shower pan or tub surround.
- Any moisture behind finish materials, discoloration in ceilings below, or damp smell that returns after cleaning.
- Drain backup that comes back after snaking, or slow drains at multiple fixtures.
- Water at the base of the toilet, especially where the bowl meets the floor.
- Shower valve or diverter leaking inside the wall (not just at the handle).
If the fix involves opening a wall, pulling a fixture, or replacing any part of the substrate underneath (the layer the tile sits on), that’s a contractor call. It’s also a good moment to review the rest of your bathroom plan with a General Contractor in Santa Clarita, because one failing area is often a signal others are close behind it.
Documenting Your Maintenance Routine for Warranty and Resale
The maintenance schedule above is worth something more than clean tile. It’s documentation, and documentation is what supports a warranty claim and what a homebuyer’s inspector will want to see. Here’s what to keep:
- A simple maintenance log: Date, task, product used. A phone photo of the receipt works. You don’t need a spreadsheet; a running calendar on your phone works fine.
- Product records: Keep the spec sheets for your grout and sealer. When a joint fails, the first question is whether it was sealed to spec and when.
- Photos of every joint on install day, and every 12 months after: This is the single biggest thing that supports a guarantee claim, because it shows the joint was maintained, not just present.
- Contractor documentation: Your written price, your written guarantee, and the arrival window are all part of your warranty file. Penhallow’s written guarantees live in the same place as your maintenance log.
- Disclosure packet at resale: Include the maintenance log and the original guarantee documentation in your disclosure. Santa Clarita buyers and their inspectors respond to a bathroom that has documented maintenance and a paper trail.
If a future owner ever asks whether the bathroom was properly cared for, the log answers it. That’s the difference between a 20-year bathroom and a 7-year bathroom that needs the tile pulled.
Common Mistakes to Avoid
- Caulking over old caulk instead of removing it. The new bead sticks to old silicone, not to the tub or tile, and it fails within a year. Removal first, every time.
- Sealing grout that’s still dirty or still wet. Sealer traps grime into the grout permanently. Clean, dry, then seal, with at least 24 hours of drying time in Santa Clarita’s dry climate.
- Ignoring the exhaust fan. A clogged fan is the quiet tax on every other maintenance interval in the room, and replacing one is far cheaper than re-grouting a shower.
- Using bleach-based or abrasive cleaners on sealer or epoxy grout. Bleach degrades sealer and abrasive pads scratch epoxy. A pH-neutral cleaner does the job without shortening the material’s life.
- Running a whole-house water softener without softening the showerhead descale interval. Softeners reduce scaling, not eliminate it. Keep descaling monthly, at least on the showerhead.
- Not photographing failures. When a joint fails and you call for the guarantee, the photo of the failed joint is what makes the claim fast. Missing photos make it slow.
- Treating a crumbling grout joint as a cosmetic problem. It isn’t. Crumbling grout in a shower is the first sign of water in the substrate, and the longer you wait, the bigger the eventual repair.
See the difference
 Before
 After
 Before
 After
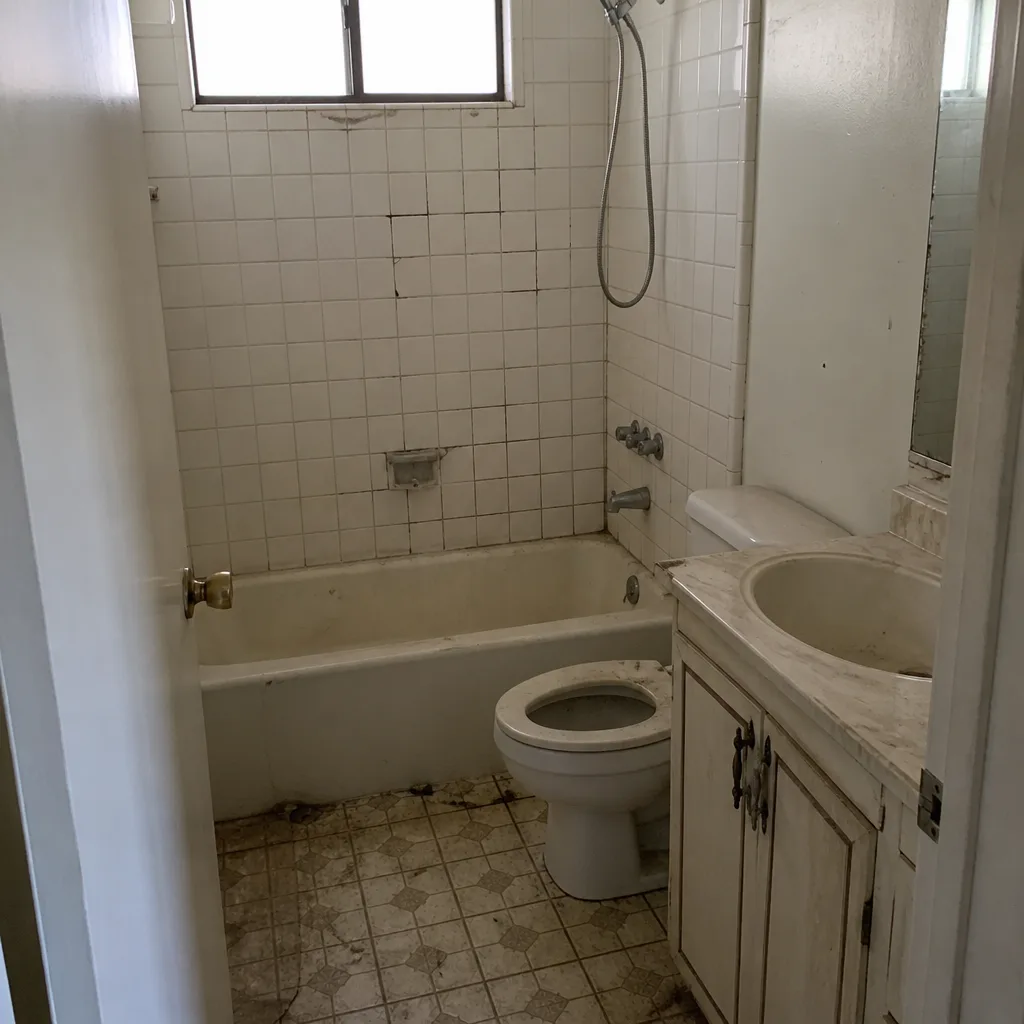 Before
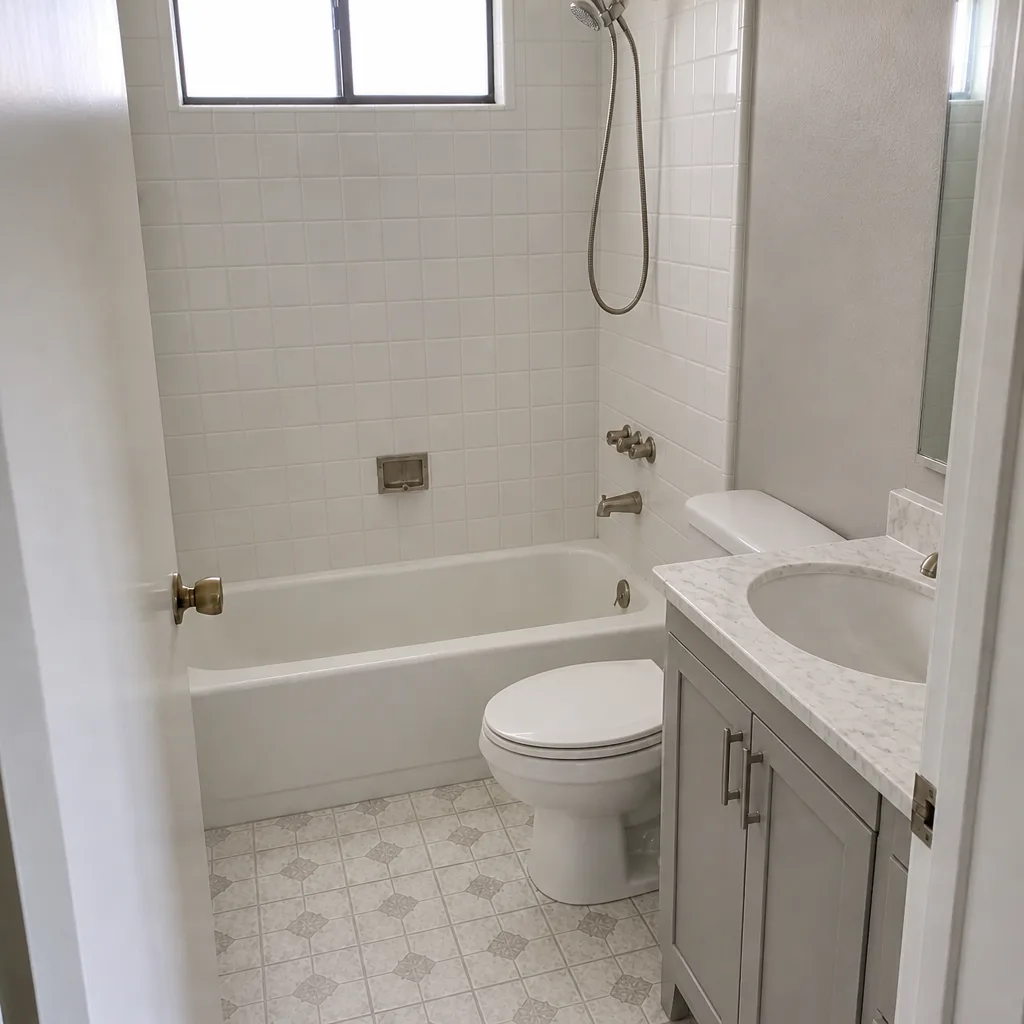 After
When to Call a Professional
Three situations in a bathroom are contractor calls, not DIY jobs: grout that’s failed through to the substrate, moisture behind finish materials, and a drain backup that keeps returning after a snaking. Add a fourth: any shower or tub that flexes when you step in. Each of those points to a problem below the surface that cleaning and caulking won’t reach. Small fixes are fine on your own if the joint is sound. If it’s a repair, get it diagnosed properly. Penhallow Remodeling Santa Clarita offers free written estimates in Santa Clarita. Call (866) 383-6693 to schedule one. You’ll get a written price before any work starts, and a 365-Day Done Right Promise in writing on every project. If a repair fails, we come back at no charge.
Frequently Asked Questions
Every 3 to 5 years for silicone caulk at the tub-to-tile joint, and sooner if the joint peels, gaps, or shows mold that returns after cleaning. Bathrooms in Santa Clarita with hard water and daily shower use often fail on the 3-year end of that range. Call (866) 383-6693 for a repair estimate if the joint has already failed.
No. Epoxy grout doesn’t need sealing and can actually be damaged by abrasive cleaners used during sealer prep. Cement-based grout, by contrast, needs sealing every 12 to 24 months depending on traffic and moisture. Use pH-neutral cleaner on epoxy and skip the sealer entirely.
Every 6 months for most homes, and every 3 months if the bathroom is used daily by more than two people or if you have pets. Santa Clarita’s dry climate makes a clogged fan easy to miss because the room doesn’t fog up the way it would in a humid climate, which means the moisture problem builds silently. The 15-minute clean is what keeps every other seal and grout interval honest.
Monthly: showerhead and fixture descale. Quarterly: exhaust fan grille check and full-joint caulk inspection. Every 6 months: full exhaust fan clean. Every 12 to 24 months: grout re-seal. Every 3 to 5 years: caulk replacement. That’s the baseline; add a water softener and fixture intervals stretch out. Hard water is the variable most homeowners underestimate.
Yes, meaningfully. Softened water reduces calcium and magnesium scale, which are what degrade grout, showerheads, and faucet finishes over time. Homeowner-reported payback against fixture replacement and cleaning products in Santa Clarita runs 4 to 7 years depending on hardness at the address. If a softener isn’t in the budget, a shower filter at $30 to $100 extends the descale interval by about half.
Yes, and it’s one of the two things that determine whether a warranty claim moves fast or slow; the other is documentation of the failure. A dated log with photos of each joint and a copy of the original written guarantee and written price are what allow a contractor to confirm the failure wasn’t from neglect. If your bathroom was built without a written guarantee, plan on the contractor route for any failure that touches the substrate.
The Bottom Line
A remodeled bathroom’s lifespan is set by what happens after the last tile is set, not before. Caulk joints at 3 to 5 years, grout sealing every 12 to 24 months, exhaust fan cleaning every 6 months, and monthly descaling in Santa Clarita’s hard water handle the bulk of the schedule. Grout failure through to the substrate, moisture behind finish materials, and returning drain backups are contractor calls. Document everything. Maintain to the schedule and you protect a 20-year bathroom; skip it and you’ll be redoing tile in 7 years. Either way, know the schedule before the project starts.
If you’re in Santa Clarita and ready to plan a Kitchen Remodeling in Santa Clarita or bathroom project with a written price up front and a 365-Day Done Right Promise in writing, start at our Penhallow Remodeling Santa Clarita home page. Our technicians have up to 22 years of experience, arrive in uniform, and are background-checked on every job. Call (866) 383-6693 for a free written estimate. A live person answers, 24/7.
Written by the team at Penhallow Remodeling Santa Clarita.